Wednesday 14 October 2015

Jetbrains Tools for Students

 Jetbrains offer their, frankly outstanding, development tools FREE to students. All you need to apply is to be a student and have access to your student email address or a valid ISIC card. All that's involved is signing up for a Jetbrains account with your college email. You will then be able to use the products, fully licensed, for a year.

Free Products for Students.

Great tools such as IntelliJ, ReSharper, PyCharm and WebStorm for nothing.Tools for  Java, PHP, JavaScript, Ruby, Objective C and Python as well as analysis plugins for Visual Studio are included.


You will need to renew your student license every year to prove you are still a student. Follow the link below for further details:

https://www.jetbrains.com/student/

Tuesday 11 March 2014

GitHub Education Discount - Free Stuff!

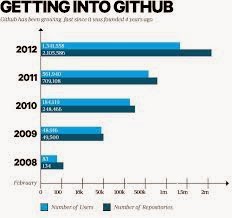
Github.com is a very powerful and useful tool. For those of you who don't know what GitHub is, it is a version control system. Version control allows you to keep your source code safe and incrementally test, publish and share code.  A free account is available but all the repositories are public. Eclipse and Visual Studio plugins are available. A micro subscription allows for 5 private repositories in addition to the public ones.


GitHub micro is usually $7/month but you can request an education discount. If you have setup an account previously with GitHub login and go to account settings emails and add the email address of your educational institution and click verify. You will need access to the email account to verify the email address.
While still logged in go to education.github.com and click request a discount. Enter you name, choose your verified educational institution email, Institution name, year of graduation and a brief outline of how you intend to use it. Github, upon qualification, will usually give you the micro plan free until graduation.
If you haven't set up GitHub what are you waiting for.


Simples!

Adding Google Play SDK in Eclipse

To develop an app using the Google Play Services API, you must download the Google Play services SDK using the SDK manager. I am making an assumption here that you have Eclipse installed and the Android Development Toolkit (ADT), if you don't stop reading and do so. Note that this article is for Android 2.3 or higher, if your developing for Froyo just stop!


Install the Google Play services SDK:

  1. Launch the SDK Manager in Eclipse select Window > Android SDK Manager.
  2. Scroll to the bottom of the package list, expand Extras, select Google Play services, and tick it. The Google Play services SDK is then saved in your Android SDK environment in <path_to_sdk/extras/google/google_play_services/.   
  3. Install a compatible version of the Google APIs platform. If you want to test your app on the emulator, expand the directory for Android 4.2.2 (API 17) or a higher version, select Google APIs, and install it. Then create a new AVD with Google APIs as the platform target.
  4. Make a copy of the Google Play services library project.Copy the library project at <android-sdk>/extras/google/google_play_services/libproject/google-play-services_lib/ to the location where you maintain your Android app projects.
  5. Import the library project into your workspace. Click File > Import, select Android > Existing Android Code into Workspace, and browse to the copy of the library project to import it.

To make the Google Play services APIs available to your app reference the library project you created in step 4 above.
After you've added the Google Play services library as a dependency for your app project, open your app's manifest file and add the following tag as a child of the <application> element:

Once your project references the library project, you can begin developing features with the Google Play services APIs like maps.

Google Play Services 4.2 has just been released and now includes support for developing for Chromecast and Google Drive.

Simples.

Monday 10 March 2014

Perfect Timing. A Timer Class to estimate performance.

When testing the performance of your code it can be useful to use  the currentTimeMillis() method in System. Usually you would use it as follows:


I found it useful to create a Timer class and instantiate a Timer object in my production code. This allows me to drag my Timer.class into new projects and use saved snippets to instantiate and call the methods of the class. i can therefor easily remove the testing code before release. I can also add various methods in the class that I can call if and when needed rather then constantly rewriting calculations.

Here is a basic timer classs with a little extra thrown in  the toString() method:


and this is a basic test program. You should alter the duration of the loop to see the results.


It should be noted that currentTimeMillis() is not the most granular of  timers  and reults will vary. You should run it multiple times to get a more accurate representation of the time taken, this also lets the compiler optimize the bytecode. Using TimeUnit from java.util.concurrent allows conversion of time units for a "plain english" representation of time taken. The TimeUnit is overkill here, it is only necessary for longer durations (> hour), but there is no harm in highlighting its existence and usefulness.

Simples!

Saturday 22 February 2014

Leading Zeros on Integrals in Java

Sometimes you may need to have leading zeros on an integer in java. It is easy to do this using formatting. The example shown below uses printf but anything that uses Formatter will achieve the same results. There are caveats though when reading in from a file for example. Lets look at the sample code first and discuss the caveats later.

The code is a simple loop that runs on the printable range of the ASCII table. The results are the int value, character printed, hex value, whether the character is a legal Java identifier and whether the character can legally be the start of a Java identifier. The Character wrapper class contains the methods used to test legality but it is the formatting used in the printf statement on line 11 that's relevant to this post.


This results in output like this:


Many will be familiar with printf and formatter usage such as %s calling the corresponding int attribute e.g.


This prints: hello hello hello hello hello hello

The printf statement in line 11 of the sample code adds a little bit more to the mix. Firstly the 1$ is used to specify we are using the first attribute (if there was more then 1 attribute you can use 2$, 3$ etc to reuse existing attributes)i.e. the following code for the hellos above would achieve the same output:


The next thing is the 04 the 4 is the width as usual but the 0 is key. It is a flag that says to pad the result with zeros as shown in the above output. So if using following code:


outputs: 42 042 0042 00042

The Java docs describes it as follows:

The format specifiers for general, character, and numeric types have the following syntax:

    %[argument_index$][flags][width][.precision]conversion
   
The optional argument_index is a decimal integer indicating the position of the argument in the argument list. The first argument is referenced by "1$", the second by "2$", etc.


Now the caveat. Say, for example you wrote an int padded with zeros to a file. You look at the file and everything is as it should be, nice padded numbers. Then you go to read it back in and you start getting weird results. This is because Java treats ints with leading zeros as Octal. There are a few ways around this (read the field in as a String or float and parse/cast) but that is a subject for another day.

In conclusion padding with zeros is easy if you need to do it. However it may be wise not to use zero padding of integers at all or ensure the use is carefully documented/commented due to the way Java handles it. The Oracle Java tutorial on number formatting can be found here.

Download commented example here (Pastebin).

Simples.

Monday 10 February 2014

Android XML formatting in Eclipse


When working with Android in Eclipse XML errors can be easy to commit and hard to spot. Errors in your XML can lead to your code failing to compile and the auto generated files (e.g. R.java) disappearing.
Proper formatting can make it easier to spot errors like unclosed tags etc.
Take the following code as an example:

Multiple attributes on a single line, a mix of self closing and empty tags (line 15) make this code harder then it should be to read. Fortunately Eclipse has built in preferences which can help you.

In Window>Preferences>XML>XML Files> Editor


Ensure the tick is placed on Split multiple attributes each on a new line.
Ensure Insert whitespace before closing empty end-tags is ticked.
Apply and OK.
Source>Format:

Much better, right? But there's more:
Source> Cleanup Document:


Here you can do the above magic. Press OK and the code looks much cleaner and easier to read:


Simples.

Thursday 30 January 2014

Packaging multiple Java files from the command line

Sometimes it's good to leave your IDE of choice behind and go old school. A text editor and the command line. One thing that can catch people out is packaging.
If you have , for example, 3 files with the same package declaration of:

package com.modemnoise.code;

To compile this from the command line you would navigate to the directory in your terminal and execute the following line:
javac -d . *.java
You can then execute your file (yourFile.class) like so:
java com.modemnoise.code.yourFile
The folder structure will be as expected for packaged code i.e. .\com\modemnoise\code\yourFile.class The -d switch tells the compiler the code is to be compiled in an existing directory and the period(.) tells the compiler to start in the current directory. After this the compiler recognises the package declaration and creates the structure for you.

Oracle javac tech note