Tuesday 11 March 2014

GitHub Education Discount - Free Stuff!

Github.com is a very powerful and useful tool. For those of you who don't know what GitHub is, it is a version control system. Version control allows you to keep your source code safe and incrementally test, publish and share code.  A free account is available but all the repositories are public. Eclipse and Visual Studio plugins are available. A micro subscription allows for 5 private repositories in addition to the public ones.


GitHub micro is usually $7/month but you can request an education discount. If you have setup an account previously with GitHub login and go to account settings emails and add the email address of your educational institution and click verify. You will need access to the email account to verify the email address.
While still logged in go to education.github.com and click request a discount. Enter you name, choose your verified educational institution email, Institution name, year of graduation and a brief outline of how you intend to use it. Github, upon qualification, will usually give you the micro plan free until graduation.
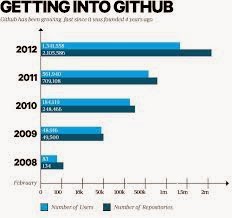
If you haven't set up GitHub what are you waiting for.


Simples!

Adding Google Play SDK in Eclipse

To develop an app using the Google Play Services API, you must download the Google Play services SDK using the SDK manager. I am making an assumption here that you have Eclipse installed and the Android Development Toolkit (ADT), if you don't stop reading and do so. Note that this article is for Android 2.3 or higher, if your developing for Froyo just stop!


Install the Google Play services SDK:

  1. Launch the SDK Manager in Eclipse select Window > Android SDK Manager.
  2. Scroll to the bottom of the package list, expand Extras, select Google Play services, and tick it. The Google Play services SDK is then saved in your Android SDK environment in <path_to_sdk/extras/google/google_play_services/.   
  3. Install a compatible version of the Google APIs platform. If you want to test your app on the emulator, expand the directory for Android 4.2.2 (API 17) or a higher version, select Google APIs, and install it. Then create a new AVD with Google APIs as the platform target.
  4. Make a copy of the Google Play services library project.Copy the library project at <android-sdk>/extras/google/google_play_services/libproject/google-play-services_lib/ to the location where you maintain your Android app projects.
  5. Import the library project into your workspace. Click File > Import, select Android > Existing Android Code into Workspace, and browse to the copy of the library project to import it.

To make the Google Play services APIs available to your app reference the library project you created in step 4 above.
After you've added the Google Play services library as a dependency for your app project, open your app's manifest file and add the following tag as a child of the <application> element:

Once your project references the library project, you can begin developing features with the Google Play services APIs like maps.

Google Play Services 4.2 has just been released and now includes support for developing for Chromecast and Google Drive.

Simples.

Monday 10 March 2014

Perfect Timing. A Timer Class to estimate performance.

When testing the performance of your code it can be useful to use  the currentTimeMillis() method in System. Usually you would use it as follows:


I found it useful to create a Timer class and instantiate a Timer object in my production code. This allows me to drag my Timer.class into new projects and use saved snippets to instantiate and call the methods of the class. i can therefor easily remove the testing code before release. I can also add various methods in the class that I can call if and when needed rather then constantly rewriting calculations.

Here is a basic timer classs with a little extra thrown in  the toString() method:


and this is a basic test program. You should alter the duration of the loop to see the results.


It should be noted that currentTimeMillis() is not the most granular of  timers  and reults will vary. You should run it multiple times to get a more accurate representation of the time taken, this also lets the compiler optimize the bytecode. Using TimeUnit from java.util.concurrent allows conversion of time units for a "plain english" representation of time taken. The TimeUnit is overkill here, it is only necessary for longer durations (> hour), but there is no harm in highlighting its existence and usefulness.

Simples!